Products Used

Tools Needed

How Much Product Do I Need?

Project Prep

Determining the types of loads that your wall will be subjected to is a crucial first step—a decorative wall is far simpler and will require next to no reinforcement, whereas a low retaining wall or other structural wall will likely require grouting and rebar reinforcement.

It’s crucial that you consult your local building code before tackling a load-bearing wall. For the purposes of this Project Guide, we’ll assume a simple, non-load bearing structure.

  1. First off, prep your site by marking the outline of your wall.
  2. Excavate to below the frost line in preparation for pouring a footing.
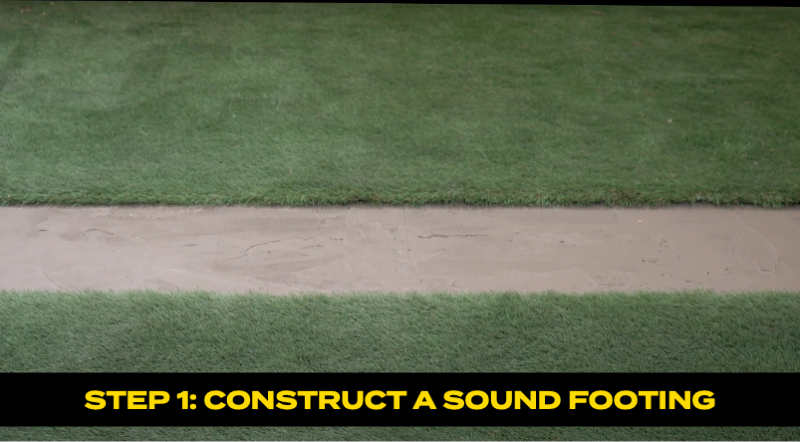
  3. Pour the footing. See our Pouring A Slab Project Guide for guidance.
  4. Allow footing to cure per product instructions—approximately 1 week—before moving on to the next step.

Project Tip: The footing should be approximately twice the width of the block wall – typically 16”.

Estimating

  1. One bag of Surface Bonding Cement will cover approximately 25 square feet of wall.
  2. Estimate your project using the Mortarless Masonry calculator then add 10% to ensure that you have enough material to complete the job.

Mixing

Mixing is done in two stages for a dry stack wall—a small initial batch to lay the first course, followed by additional full-size batches once the entire wall is stacked.

  1. Pour dry mix into a 5-gallon bucket, then add recommended amount of water
    1. One bag requires 5.0 – 6.0 quarts of water
    2. Surface Bonding Cement is available in gray or white but can also be tinted with Sakrete Cement Colors to achieve a custom look.
  2. Mix using an electric paddle mixer or high-powered ½” drill with a concrete or mortar mixing paddle attachment.
  3. Mix for two minutes until a “peanut butter” consistency is achieved.
  4. Add additional mix or water only a little at a time to achieve the correct consistency—you can expect for your mix to stick to the trowel when you hold it vertically, but still be easily spreadable.
  5. Pour prepared mix into a mortar pan for easy access.

Project Tip: Replace part of the mix water with Sakrete Bonder & Fortifier when working in hot, dry or windy conditions to enhance bond and reduce plastic shrinkage and cracking.

Laying the First Course

Please pay attention to the first course of your masonry wall, as it is the most critical step to the process. We recommend spending the extra time to ensure this layer is straight and level to set your project up for pro-grade results.

  1. Lay a leveling bed of Surface Bonding Cement by running two ½” thick lines of material down the footer where the blocks will be placed.
  2. Place your first corner block and check level. Tap with a hammer or the end of your trowel to adjust height.
  3. Place the other corner block and check level.
  4. Use line blocks and string to establish the alignment for the rest of first course.
  5. Place the remaining blocks between your corners to complete the first course.
  6. Maintain alignment and level of each block as you work, checking your work with a hand level along the way.

Project Tip: If your wall is less than 4’ long, you can skip the line blocks and string and simply check your work with a hand level. Snapping a chalk line is also a good way to establish your alignment.

Stacking the Wall

Time to get vertical.

  1. Stack the rest of the wall in a running bond pattern, ensuring that each course stays level and flush with the previous course.
  2. Adjust uneven areas with brick shims to maintain level. Check that level and plumb are maintained with every course using a level.
  3. Finish the wall with cap blocks. Check the level and plumb of the completed wall once more before moving to the next step.

Project Tip: Don't worry about any minor surface defects like minor chipped corners or face divots - these will be corrected during the next step.

Surface Bonding Cement Application

With the wall stacked, it’s time to bond it all together.

  1. Bring the wall to Saturated Surface Dry (SSD) using a spray bottle. Block should appear wet but be dry to the touch before proceeding.
  2. Mix a full batch of Surface Bonding Cement and pour it into the mortar pan.
  3. Fill any gaps or imperfections larger than ¼” with Surface Bonding Cement and allow to set briefly before coating.
  4. Starting at the base of the wall, use a finish trowel to apply the Surface Bonding Cement to the wall. Hold the trowel at a 45-degree angle and use a broad, arcing motion to spread material to a depth of 1/8” – 1/2″ evenly.
  5. Coat all sides of the wall, including the top, to ensure proper strength.
  6. You can have an easier time at smoothing out and blending minor imperfections as more material is added. You can also use a brush to help blend in any visible trowel marks.
  7. Mist the completed wall lightly to promote proper cure and prevent cracking.

Project Tip: Surface Bonding Cement can be painted in 7 days and reaches its ultimate 5,000 psi strength in 28 days.