Pro Tip
5 Key Considerations for Concrete Repairs
When it comes to repairing damaged concrete, no job is too small. Repairing cracks and chips in concrete is an easy job with important benefits. Fixing that crack in the driveway or unsightly chip in the curb not only looks better, it can help prevent larger, more expensive damage from happening. Here are five key considerations when completing small concrete repairs.
1. Identify the type of damage to the concrete
Identifying the exact type of damage is the first step in any repair project. Here are some descriptions of common types of concrete damage. Plastic-shrinkage cracks run to mid-depth in the concrete, are distributed across the surface unevenly and are usually short in length. Most often, they occur while concrete is curing because the surface of the concrete dries too rapidly relative to the concrete below. Hairline cracks are very thin in width but are typically deep cracks. They are caused by the settling of the concrete while it is curing and over time as conditions change. Due to their depth, these cracks can become larger after the concrete has hardened. Small pock marks, or scaling, in a concrete surface exposes the aggregate underneath. Once the damage is identified, you know what product you’ll need for the repair.
2. Collect the tools for the job
It depends on the product, but for most projects a nylon brush to clean the area of dust and debris is a must. You can also use a hammer and chisel to remove loose concrete before repairing. Pressure washing the area makes the preparation more thorough, but allow the area to dry completely before applying any repair materials. Some products come in a squeeze bottle and can be applied without additional tools or a simple putty knife to smooth the surface. For others, you will need a trowel to mold, trim and smooth the material.
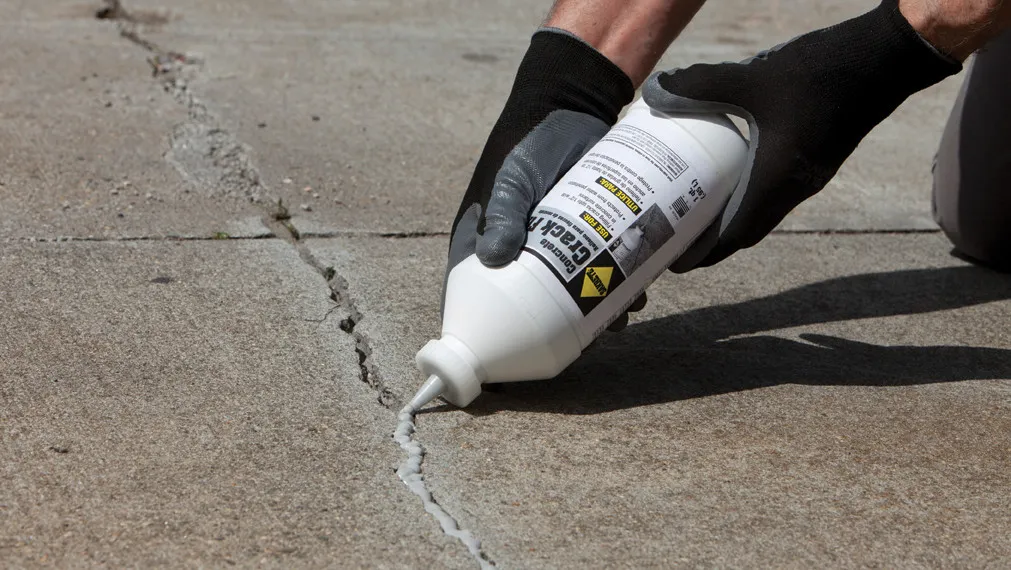
3. Choose the right concrete repair product for the job
For cracks in concrete 1/2″ to 1/4″ deep, use Sakrete Concrete Crack Filler. It can be used in interior and exterior applications, including slabs, walkways and driveways, and it protects from water penetration. Bonus: this product can be painted with latex-based paints. For applications 1/4″ to 2″ in thickness, use Sakrete Fast Setting Cement Patcher. It has a high strength of 5,000 psi and sets in about 20 minutes for the rapid repair of cracks in concrete surfaces.
4. Set realistic expectations
Repaired concrete typically doesn’t match the original color of the concrete. The color of concrete is dependent on the elements at the time of mixing and the conditions when it was poured. Concrete fades over time, so getting an exact match in color on a repair project is nearly impossible.
5. Don’t delay simple repair work
Water is your enemy, and every rain shower, freeze and thaw or snowstorm that occurs can further intensify the concrete damage. Procrastination can turn a simple job into a bigger, more expensive project, so proactive concrete maintenance and repair saves time and money in the long run.
Don’t hold off on repairing damaged concrete. Use our Product Locator Tool to find out where you can get Sakrete Concrete Crack Filler or Sakrete Fast Setting Cement Patcher.
Comments (28)
Hello…I am need to repair my basement slab. Concrete is about 100 years old and has many cracks and cold joints that leak under heavy rains. I have purchased your Concrete Crack Filler and it seems to work well. I would like to float a skim coat, maybe using your Top’N Bond Concrete patch over filled cracks for a more uniform finish. Instructions on the Concrete crack filler advises not to use a portland based product over the Crack Filler. If I painted and sealed the filled cracks with concrete glue, can I go on top of them with the Top’N Bond mixture? Thanks! Dave
David, the issue is that concrete does not like to bond to polyurethane – going to have that same issue with the Concrete Glue product. Best recommendation would be to remove ALL sealants and just fill those cracks directly with Top ‘N Bond.
Hello – My father is driving me nuts with the package of the 10lb Sekrete fast setting cement patcher. He has a bucket that is round, and colored white, green and yellow. The same Sakrete 10lb fast setting cement is now sold In a square container, and is white, red and black. Can you advise if this is still the same exact product that was sold in the white, yellow and green container? I’m telling my father it is..and he insists it is not. Thank you so much 🙂
R/ Liz
Same stuff, Liz! Sorry for the headache.
do you have concrete bag goods for structural free-standing columns? 10″ x 10″ x98″ tall that will be holding up a cypress trellis? column has 4) #5 rebar with #3 hoops 12″ o.c.
Where to buy and how many bags?
Mark, that’d be about 10x 60# bags, and yes, any bagged mix should work for that application. You’re going to have a fair amount of pressure on that column, so you might consider doing it in 2 – 3 lifts!
What ifthere are several loose chips?
Elise, starting with a sound surface is key – anything and everything that’s loose has got to be removed!
I have some leaks in my basement in the floor and at some corners. Which of your products do you recommend
Sally, if you have a crack in the wall, Leak Stopper Hydraulic Cement is your go-to product. Just remember that this is a PATCH and not a coating like Dry-Lok!
This article provides helpful tips and step-by-step instructions for carrying out the repair, such as properly preparing the surface and ensuring proper curing. Appreciated the clear and concise writing style, which makes the information easy to understand and apply.
I found it to be a useful guide for anyone who wants to repair small concrete surfaces effectively. The post explains the importance of properly preparing the surface before beginning the repair process and provides helpful tips for choosing the right materials.
I have a thin 1/8″ long crack in my patio. The surface is small stone pieces and brown sand. What product will adhere to the concrete and adhere to the small stone and sand? Thanks.
Frank, it sounds like you’d be best to use a polyurethane sealant and sprinkle a bit of the sand over top in order to blend it in. Shoot us a photo or give the team a call with more details if you’ve got em!
We’ve just resurfaced our cement porch using the Sakrete Flo-Coat.
I see that we must wait 28 days before we paint it, but just wondering if we need some
other preparation before we paint it. Do we need to use some kind of primer?
Is there a special kind of paint to use over Sakrete.
Thank you for your answer.
Colette, there is no special paint required for Flo-Coat – it’s concrete just like any other. That said, always a best practice to prime before painting!
Okay, I screwed up. I used my pressure washer on my concrete patio while cleaning my BBQ grills. I used a 0 degree tip. I thought I was holding the wand high enough. But when I pulled up the grills. There’s lines that took off the top layer of the concrete. Can this problem be fixed?
Yikes – those 0-degree nozzles are dangerous. You could always do a skim coat to restore the surface using something like Top ‘N Bond (for a small area) or Flo-Coat (for a large area).
Once the concrete steps are patched and repaired, how soon can I paint the stairs? I want to paint to increase the street presence.
Walter, we’d recommend waiting the full 28-day cure period before applying paint. Check with the paint manufacturer for any additional recommendations.
Used Fast Setting Cement Patcher. Made it about the consistency of peanut butter. Once it set it has hairline cracks. How do I repair? Another product or just use second coat with binder?
Doug, sounds like a curing issue. The BEST solution would be to remove the patch and re-apply, but this time make sure to mist the repair to keep it moist for at least 12 hours.
You could also apply Cure ‘N Seal as a final step to make this curing process even easier!
Hello Sakrete,
I was searching for some articles about “concrete repairs” today and I came across this page: https://www.sakrete.com/blog/post/5-key-considerations-for-small-concrete-repairs/
I noticed that we can be linked to one another.
Just wanted to give you a heads-up that I created a foundation concrete contractor site with articles on the different topics.
It’s more thorough and up-to-date: https://foundationconcretecontractor.com
Might be worth a mention on your page.
Either way, keep up the awesome work!
Cheers,
Argie
I have used the concrete crack filler on my garage floor. What is the best way to remove excess filler? How long should I wait to remove and paint with Sherwin Williams porch/ concrete paint?
Doug, the best way to remove excess filler would be to sand the surface or scraping it off with a blade. We recommend you give it a full cure time of 1 week before doing so.
I had large cracks in my driveway 2 inches wide and 2 to 4 inches deep. Had them repaired with Sakrete fast setting cement patcher. Worked great but now these cracks are white in color. My driveway is concrete. Can these cracks be painted over and what do you recommend.
Thanks
Lee
Lee, that’s great to hear and the cracks can most certainly be painted with a product out in the market. Another solution would be to fully power wash the driveway and see how it looks afterwards. It may be that the concrete just needs a facelift to make it look brand new. Hope that helps!
The blog emphasizes the importance of using the right products and techniques to avoid common pitfalls and extend the life of the repairs.